
 Quick Start Guide for Teachers
Avenue Support Site for Students
Quick Start Guide for Teachers
Avenue Support Site for Students
*Troubleshooting/FAQ
For best results using Avenue the LT Media Lab recommends using Chrome as your browser.
Q: What version of Flash Player do I need to run Avenue?
A: Avenue will run on Flash Player version 10.3 or higher. Avenue, like all Flash applications, benefits from your computer running on the latest version of Flash Player and operating system. If you haven't updated to the latest version, you can do so by visiting get.adobe.com/flashplayer/.
Q: I tried to update my Flash Player, but nothing is happening! It’s still telling me I need to do an update. What do I do?
A: There are a few possible issues here:
- You downloaded the latest version of Flash Player but didn’t actually install it. You may have to temporarily disable your AntiVirus software to complete the installation. After downloading the Flash Player installer, double click on it to begin the installation process:
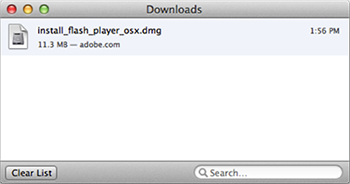
Next, follow the onscreen instructions to complete the installation. You will be prompted to close your browser. Once installation is complete restart your browser and try again.
For complete and thorough installation and troubleshooting for Windows: helpx.adobe.com/flash-player/kb/installation-problems-flash-player-windows.html
For Mac: helpx.adobe.com/flash-player/kb/installation-problems-flash-player-mac.html - The operating system on your computer is lower than what is required for Flash Player 11. Flash Player 11 requires at least Mac OS X 10.6. If you are using Mac OS X 10.5 you can upgrade to 10.6 with the Snow Leopard upgrade sold at Apple Stores. Once you have upgraded to Snow Leopard or a newer operating system you will then need to install the latest Flash Player. Please check the system requirements for Flash Player 11 here: adobe.com/products/flashplayer/tech-specs.html and compare them to your machine.
Q: How do I know what kind of operating system my computer is running on?
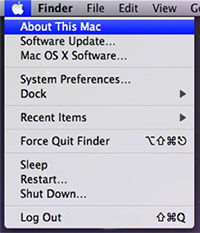
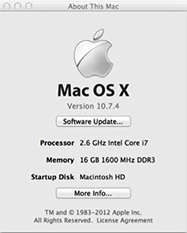
A: To check your operating system on a Mac, select the Apple menu bar at the top of your screen and select “About this Mac.” A window will then pop up with the computer information.
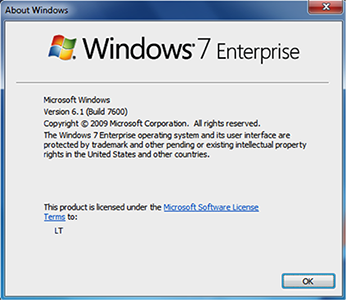
To check the version for the Windows operating system, click the Start button, type winver in the search box and then press enter.
Q: How do I know what version of Flash Player I have?
A: You can find out the version of the Flash Player you have installed by going here adobe.com/software/flash/about/.
Q: I'm having trouble logging into Avenue. I reset my password, but it’s still not working. What am I doing wrong?
A: There might be a few issues:
- An incorrect username. Your username for Avenue is your email address. Passwords are case sensitive, so when you log in with your new password you need to enter it exactly how you created it and account for upper case letters, characters, etc.
- Spam filter - Check your spam folder for the password reset email from avenue (our email). Add avenue-support@umn.edu to your spam filter exclusions.
- Not completing the reset process - Password reset is a two-step process. Once you receive the password reset email you have to click the link in the email to go to the password reset page. On this page enter a new password and click OK to confirm. NOTE: To reset your password select the “Forgot password” button on the Avenue home page. Enter your email address and then check your email account for an email from Avenue Support and then follow the directions.
Q: Why isn’t my camera turning on? I can’t click the ‘Allow’ button on the pop up box.
A: Go to Flash Player Global Settings manager here macromedia.com/support/documentation/en/flashplayer/help/settings_manager06.html.
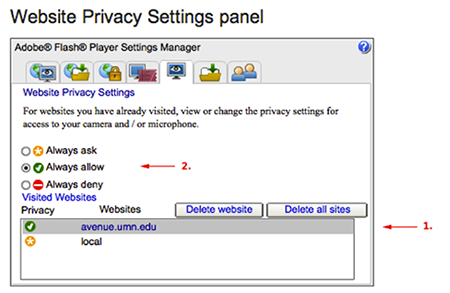
- Select the avenue.umn.edu in the list of websites.
- Select "Always Allow" check box.
- Restart the browser.
NOTES
If the avenue.umn.edu site is not in the list then you may need to revisit the Avenue site and wait until the Allow Camera image shows. Once that shows then retry the steps above.
Q: I’m having trouble viewing the media. Sometimes the video is choppy or I only see the loading bar or a black screen where the video is supposed to be. How do I fix this?
A: There are several ways to solve this:
- Plugging into a wired connection will give you a faster connection over a wireless connection.
- Upgrade your Internet speed. You can check your speed at speedtest.net. You need at least 1 to 1.5 Mbps. Contact your Internet service provider if it’s less than this.
- Move to a faster network. The secure network on campus is much faster than many locations.
- Disconnect other Internet devices. Browsers, downloads, video games, YouTube, and Netflix all use download and upload bandwidth. If there is a lot of network traffic going on it will slow down your video. Close these down and try again.
- A choppy Flash video usually comes from a low-functioning camera, a slow computer or a computer running on battery, which can sometimes decrease the performance. Make sure the equipment you are using is in optimal condition.
Q: How do I know someone can't get my User ID or password?
A: Your password is encrypted in our database. That means the letters and numbers are mixed up, so even if someone can see your information, they don't have the "key" to unlock the encryption. Be sure to keep your User ID to yourself for security.
01Teacher Support
Welcome to Avenue! In this section, you will learn the basics of using Avenue from the teacher side. We'll walk you through each part of the application and you'll be using Avenue with ease in no time!
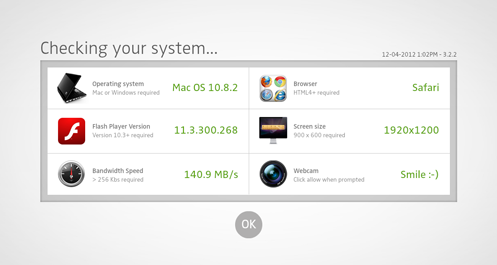
Checking Your System Requirements
Before logging in, Avenue will automatically check your system to ensure optimal performance. If your device is not meeting the system requirements, you'll be given directions on how to address them.
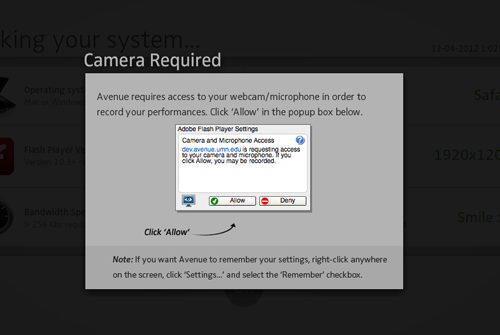
Accessing Your Camera & Microphone
To use Avenue, accesss to your webcam and microphone is required. When the popup box appears asking for permission to access your camera and microphone click "Allow." If you want Avenue to remember your settings, right-click your mouse anywhere on the screen, click "Settings..." and select the "Remember" checkbox.
Logging Into Avenue
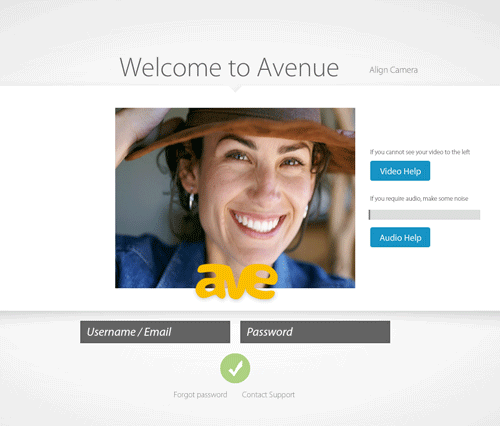
- Enter your username. Your username is the email address you used to sign up for Avenue.
- Enter your password. Passwords are case sensitive, so make sure it's entered exactly how you created it.
- Click the checkmark button and you're good to go!
- Forget your password? If you forget your password, click the "Forgot Password" link at the bottom of the screen. You will be prompted to enter your email address/username. An email will be sent to you with directions on how to reset your password.
Using "My Dashboard"
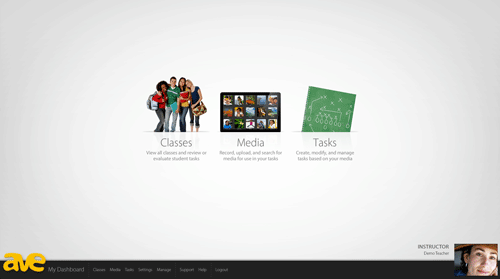
In your dashboard you can:
- View your classes and review or evaluate student tasks by clicking on Classes
- Record, upload, and search for media by clicking on Media
- Create, share, modify, and manage tasks by clicking on Tasks
- Check your settings by clicking the Settings button in the footer menu
- Link to the management system by clicking the Manage button in the footer menu
- Contact our support staff by clicking on the Support button in the footer menu (before you do that, remember to check back here if you have any questions about using Avenue!)
- View the video tutorials for each screen by clicking the Help button in the footer menu
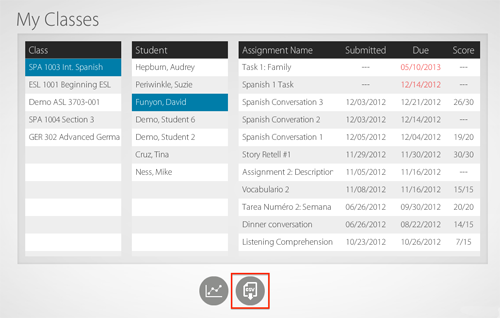
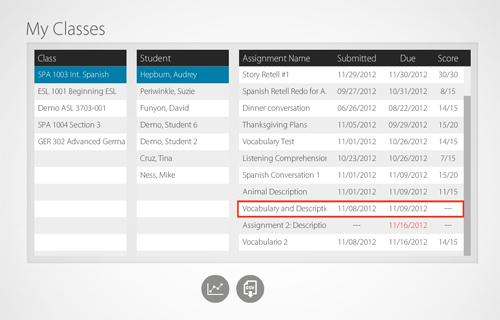
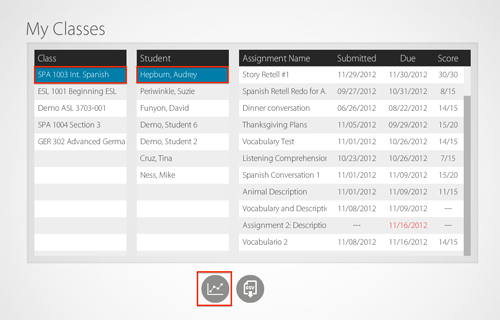
Using "My Classes"
Under "My Classes" you can view your classes and review or evaluate student tasks. To evaluate a student's task, first select the student's name. The list of tasks assigned to the student will appear:
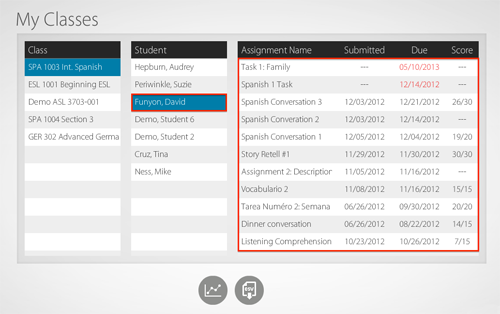
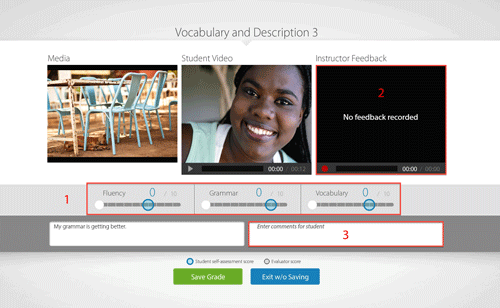
Selecting a completed task will take you to the student assessment screen:
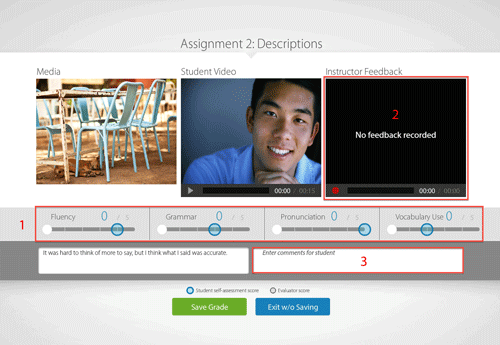
Here, you can view the student's performance and then score their performance by
- Using the sliders to give a numerical score
- Providing video feedback
- Providing comments in the text field
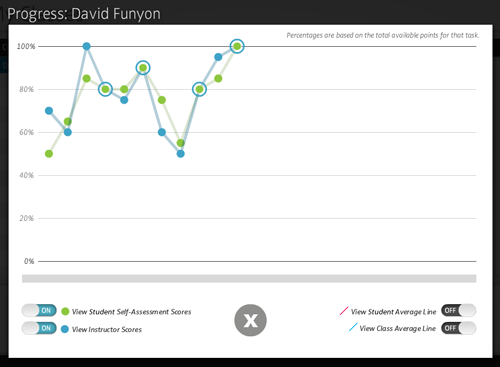
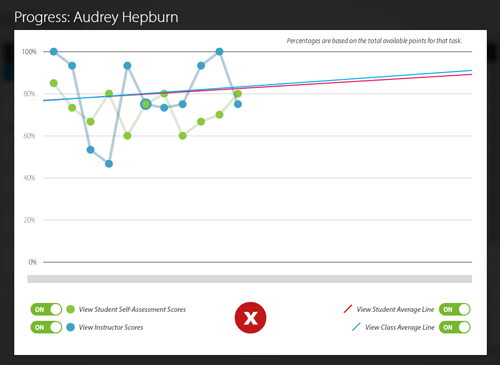
After you save the grade and return to the dashboard, select the data icon to get a visual display of the student's progress:

The CSV icon allows you to export individual student performance data for review in programs like Excel:
Using "My Media"
Your Media Library is where you will create or pull in the media you want to use in the tasks you build:
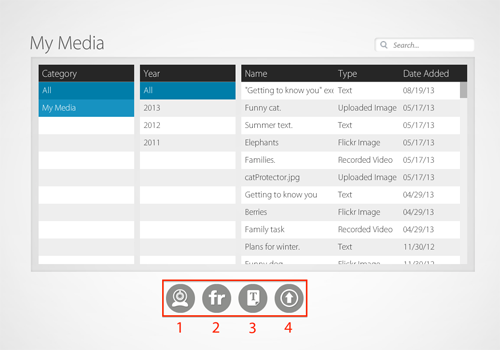
Here, you can:
- Record a video
- Search Flickr for an image
- Add text media
- Upload media files from your computer
When creating a video, use the red recording button to start. You will have up to three minutes to record content. Once you've completed the recording, stop it, give the video a title and then save it to your library.

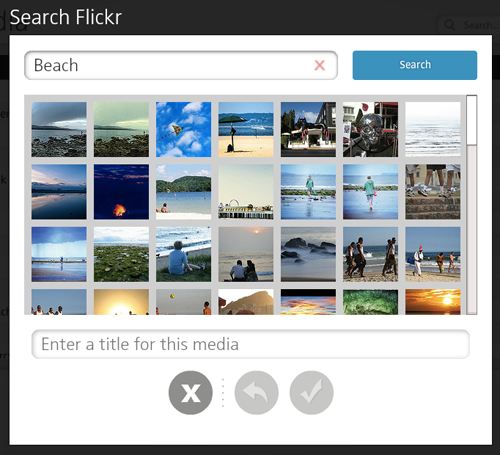
To search for images using the Flickr integration tool, type in a keyword to search for. The search will return images that fall under the Creative Commons license.
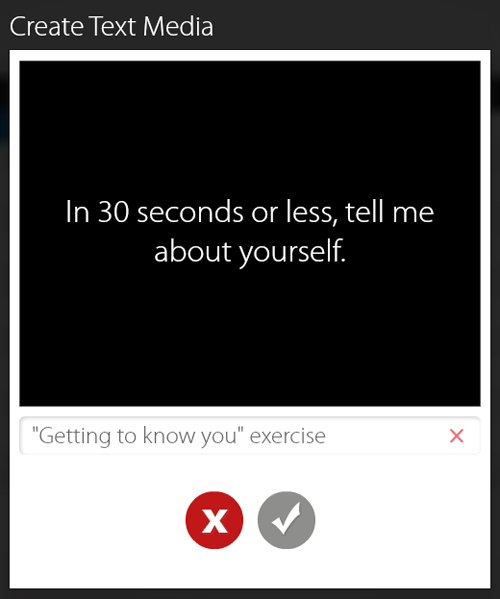
To create a story stimulus using the text media option, begin typing into the text field:
Uploading an image or video from your hard drive is easy. Just make sure the media file meets these requirements:
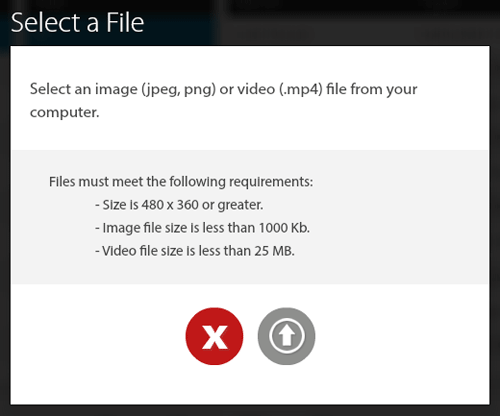
Anytime you want to edit the name of the media asset, complete these easy steps:
- Select one of the media assets in your library.
- A pop up will appear where you can edit the media name or delete the media item altogether.
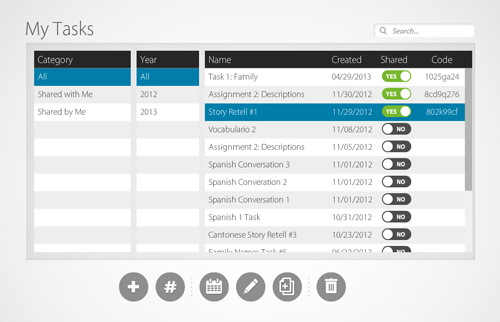
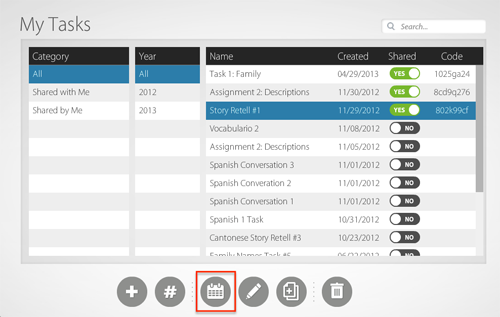
Using "My Tasks"
Your Task Library archives all of the tasks you create in Avenue. Here you can create new tasks, share tasks among your colleagues by using “Task Tokens,” assign tasks to your students, edit and duplicate existing tasks or delete tasks altogether.
Shared Task Tokens
If you have a task that you would like to share with your colleagues, you can do so by clicking the “Shared” toggle switch to “Yes.” A code will be revealed where you can copy and send it off in an email. Note: You will need to keep the switch on “Yes” for recipients to be able to pull the task into their Task Library.

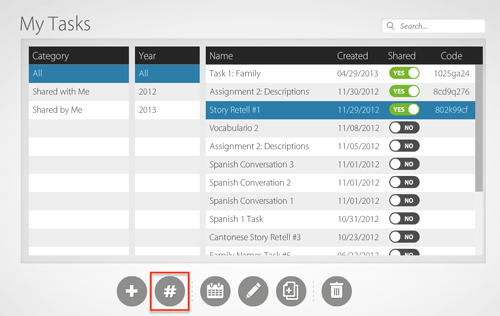
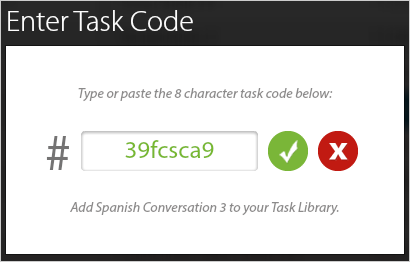
If you receive a code from another instructor, click on the # (hash) button located at the bottom of the library and enter it. This will create a new instance of the task including all of the original task information but with a new code. You are now the owner of this task and can edit it as you like.
Assigning Tasks
To assign a task to your students, click on the “Calendar” button located at the bottom of the Task Library.
You can assign tasks to entire classes or individual students by highlighting the names and dragging them all the way to the right-hand table.
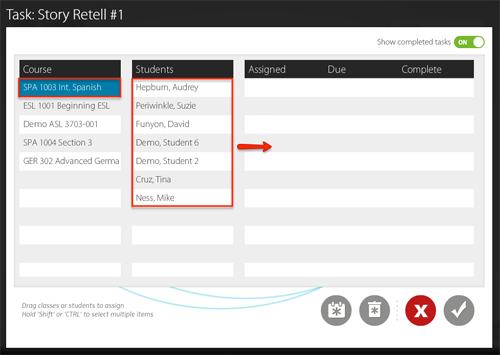
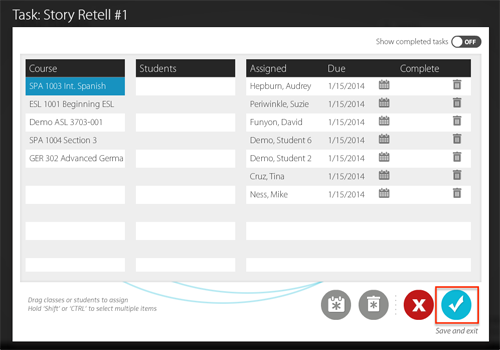
To set a global due date for all of the students, select the “Calendar” button at the bottom of the table. A calendar will pop up and you can select the due date. If you’d like to set individual due dates, select the smaller calendar icons next to each name. If you change your mind and want to un-assign the task, select the trash icon. Note: You can un-assign tasks as long as no students in the class have completed it.

To assign the task to your students, select the “Check” button and the students will receive an email notifying them that a task has been assigned for them to complete.
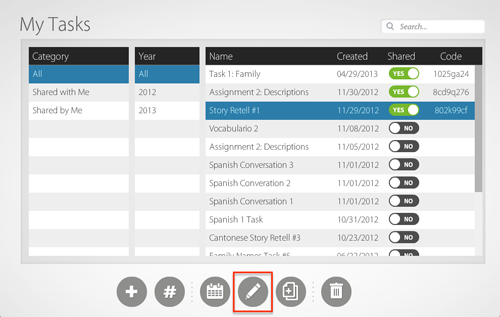
Editing Tasks
To edit an existing task, select the “Edit” button. You will be taken into Task Builder where you can edit the task. Note: If one or more students have already completed the task you will not be able to edit it.
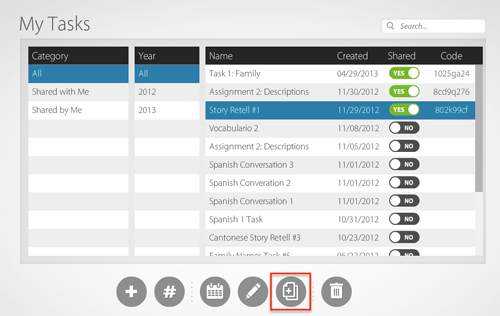
Copying Tasks
To make a copy of an existing task, select the “Copy” button. A copy will be added to your library. Copying an already existing task saves you some time if you want to keep the technical components of the task but would like to change the media, for example.
Deleting Tasks
To delete a task from the Task Library, select the “Trash” button. Note: Once a task has been deleted it cannot be recovered. If you accidentally delete a task that was already assigned to students, they will not be affected.

Task Builder
Task Builder is designed to simulate what the students will see when they begin a task, so try not to be distracted when you see yourself in the video as you move through and build a task. To better understand the features, we recommend that you log into Avenue and follow along as we walk you through the basic structure of creating a task.
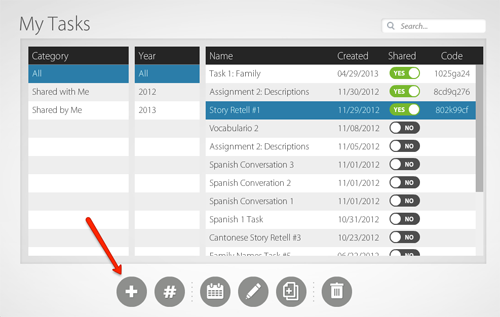
In your Task Library, select the plus button to create a new task.
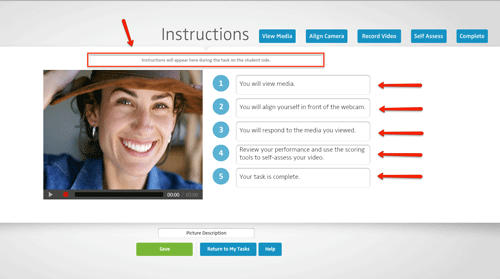
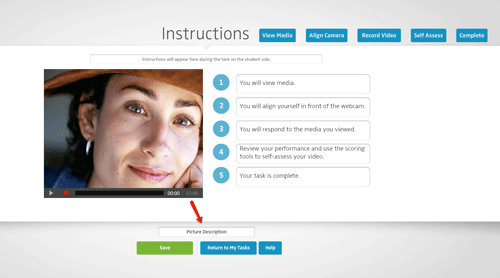
Instructions
Modify the instructions or keep the default instructions. The instructions you provide (either the pre-loaded or your edited version) will appear for the students at the top of their screen above the media.
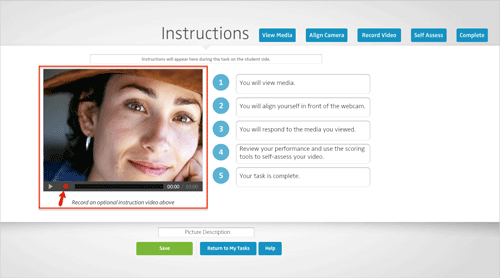
You can also record an instruction video in which you provide additional information for the students that complements the written instructions off to the side. This might be used to remind students of certain strategies, to indicate materials students will need to complete the task (textbook, etc.), to explain the scoring rubrics, or for other preparatory notes. Note: This piece is optional and does not need to be included as part of the task. If you do not include an instruction video, this feature will not appear on the student side when he/she opens a task.
Don’t forget to give your task a name! You will not be able to save a task if it doesn’t have a name.
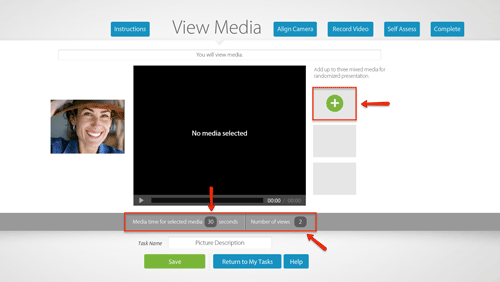
View Media
Under “View Media” you can add media that you created from in your Media Library or you can create new media within Task Builder. Select up to three assets to randomize the selections that the students will see as part of their formative and summative assessments. Keep in mind that only one piece of media will show up on the student side.
You can also select the amount of time you want your students to view the media (if it’s an image or text prompt) and the number of times they are allowed to view the media before going on to record their response.
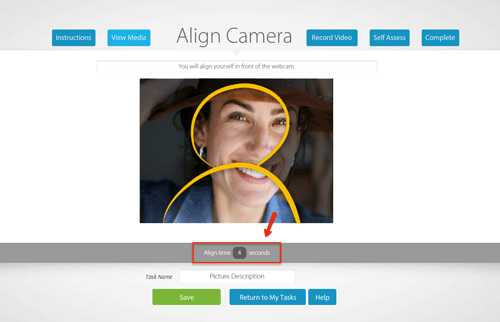
Align Camera
Next, you can set the camera alignment time for your students. The default is four seconds before moving on to record the video response. You can increase the time to afford students more opportunity to become comfortable with being on camera or to think about the media they just viewed.
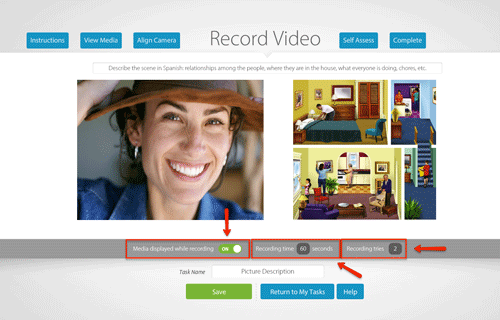
Record Video
Under “Record Video” you can decide whether you want the media displayed while the student is recording (as shown below), set the length of time the student will have to record and how many times the student is allowed to re-record a response. Only the student’s final response will be saved and sent to the teacher; students will not have the option of viewing all of their attempts and choosing which one to submit.
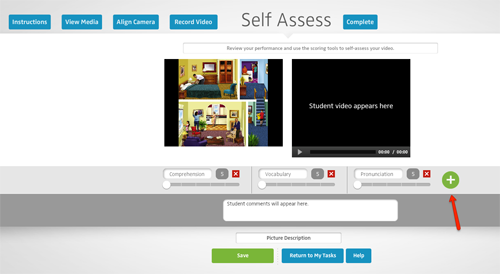
Self Assess
Next, you can create up to four custom rubrics and point totals. To add a rubric, select the green plus button. Give your rubric a name and assign a point total. The student’s recorded video will appear on the right and he/she will be given the opportunity to evaluate his/her performance and leave comments for you in the text field.
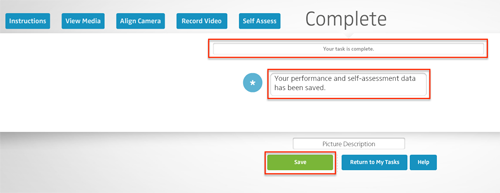
Complete
Lastly, leave a message for your students upon task completion or keep the default message. Save the task and return to the Task Library to create additional tasks!
Providing Feedback
Providing feedback to your students is simple. Once your students have completed their assigned task, you will receive an email notification.
When you are in Avenue:
- Go to your "Classes" view either from the dashboard or from the footer menu
- Select a class
- Select a student
- Select the task the student just completed
Once you select the task, you will be taken to the feedback screen where you can view the student's performance and provide assessments.
You can score their performance by:
- Using the sliders to give a numerical score
- Providing video feedback
- Providing comments in the text field
Data Visualization
The interactive visualization tool in Avenue displays student performance and progress in an informational graph.
To review a student's progress data:
- Go to your "Classes" view either from the dashboard or from the footer menu
- Select a class
- Select a student
- Click the data icon to view the student's progress
The graph will display and you can compare and contrast individual student data with an entire class.
02Management System
Avenue's integrated learner management system makes managing data across multiple classes simple. Here are some quick and easy steps to add your classes and invite students to sign up.
Logging into the Management System

- Enter the email address you used to create an Avenue account.
- Enter your password. Passwords are case sensitive, so make sure it's entered exactly how you created it.
- Click the "Login" button
- Forget your password? If you forget your password, click the "Lost Password?" link in the lower lefthand corner. You will be prompted to enter your email address. An email will be sent to you with directions on how to reset your password.
Adding Classes
Adding a new class in Avenue is a straightforward process. You can add as many classes as you want in just a few steps.
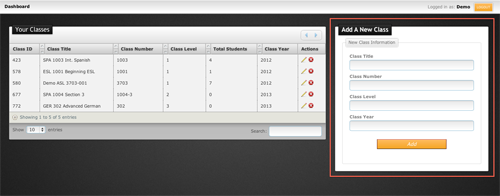
- Under the "Add a New Class" table on the right, fill in the text fields
- Click the "Add" button
Your class will then immediately show up in the table on the left hand side.
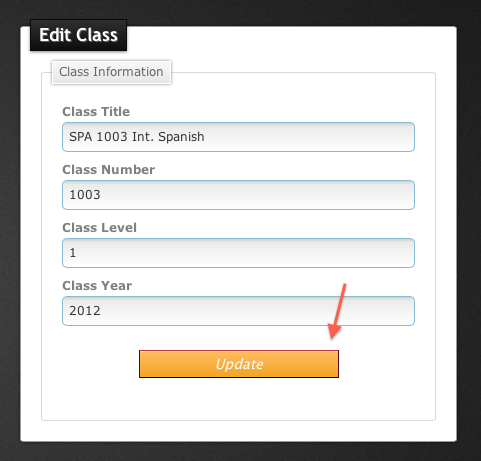
Editing Classes
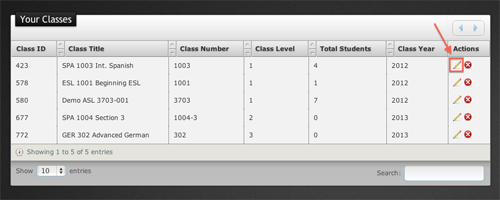
- Select the pencil icon in the Actions column for the class you would like to edit
- A new page will load with a table listing the students in that class and a table on the right where you can edit the class information
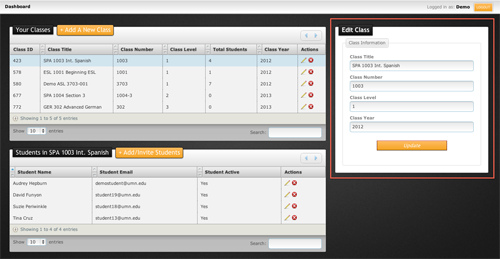
When you are finished editing the information, click the "Update" button and your class information will be updated.
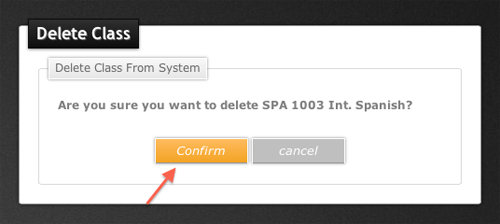
Deleting Classes
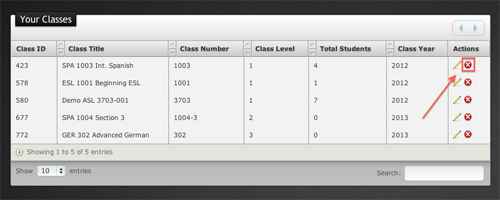
- Click the red "X" icon in the Actions column for the class you would like to delete
- A new page will load with a table listing the students in that class and a table on the right where you can delete the class altogether
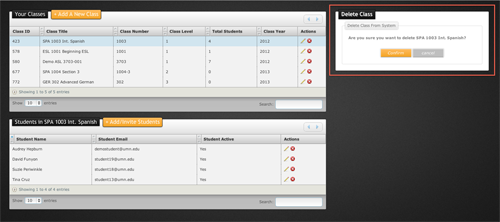
When you are sure you want to delete the class, click the "Confirm" button and the class will be removed.
Add/Invite Students
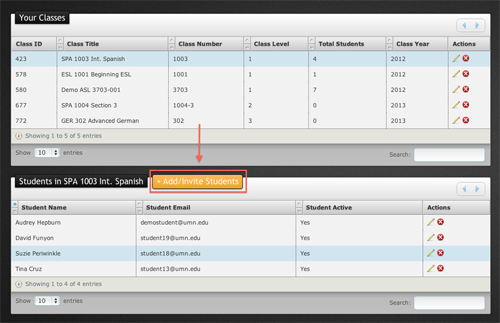
- Select a class
- Click on the "+Add/Invite Students" tab in the table below it
- A table will appear on the right hand side with information on inviting students to the class and also manually adding them
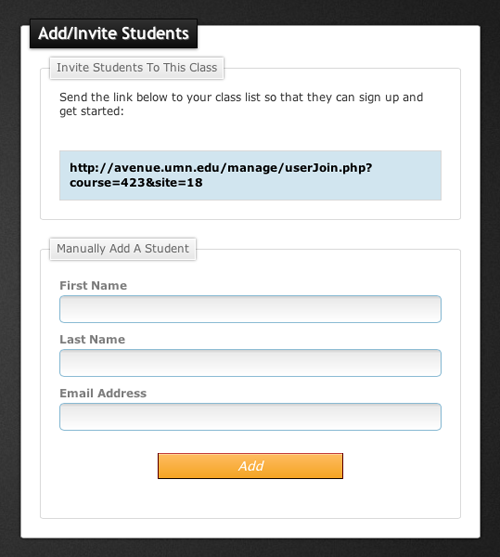
The quickest way to add students is to copy the link located at the top of the table and email it to your students. Or you can manually add students by filling out the text fields. When you are finished, cick the "Add" button and your student will be added to the class.
03Avenue iPad Student App
The Avenue iPad student app is an extension of the online Avenue environment and functions exactly the same way. However, right now this app works for student accounts only. The teacher version remains in the browser.
For more information on the app, please visit the Avenue student support page.